
Travel bikes.
One option I offer on many of my bikes is S&S Couplers. The couplers are precision machined stainless steel pieces that are built into the frame so that it can broken into 2 pieces and put into a very small travel case for airline travel. It seems hard to believe when you first see the 26”x26”x10” hardcase that one can fit a full sized bike into it but it works very well and ends up being small enough that it doesn’t incur an oversized baggage fee from airlines. I thought I’d take a minute to show the process of how the couplers are installed into the frame and share some photos.
There are two ways builders put couplers into frame when building a new bike. The first is to build the frame and then cut it in half and braze the couplers in place. I’ve never been a fan of this method. It certainly works but I prefer plan B. I install the couplers into the tubes before they go into the frame and then treat that tube like any other tube and miter and braze it as normal. I prefer this method for two reasons. The first is there is much less risk if something were to go awry. Make a mistake cutting a finished frame or have the brazing not go as it should and you end up tossing a full frame (along with it’s material and labor costs) into the recycle bin. The second reason (and frankly the bigger one to me) is that I can better control the placement of the tube butts relative to the coupler itself.
I feel strongly that the part of the tube that is inserted into the both sides of the coupler should be the thicker butted section of the tube. This often means using a tube that has longer butted sections to achieve this. The tube will weigh a few grams more but I feel it’s more than worth it for the lifetime durability of the frame.
Here’s how it works —
I start by carefully measuring the butts of the tube and making high tech sharpie marks on the tubes to show the end point of the thick section of the tube. This then allows me to balance the front/rear butted sections of the tube and where the coupler should be installed. I then cut the tube in the proper place ending up with the top and down tubes each being two pieces.
I then make sure that the ends are perfectly square and then clean them well and silver braze the stainless coupler pieces into the tubes. This is a simple procedure and is just like brazing a lug — only easier due to it’s limited size.
Now I hurry up and wait for the pieces to cool and once fully cool they go into a hot water bath for a few minutes to soak the flux off. With the flux removed I can inspect the joint and make sure it’s all good and then I can join the two sections of the tube together using the coupler nut. The nut I use during the build process is a bit different than the one that will be on the bike once done. The ‘working nut’ is a plain steel affair that can get hot and scratched up during the build process. Once the frame is all done it will be replaced with the polished stainless nut with the spanner fittings used to tighten it properly for use. So the working nut is slid into place and then the spiral ring is put in place and then the two parts of the tube can be joined and treated as one.
At this point the build goes like any other build and my only coupler related concern is making sure that the coupler’s lug points are dead center top and bottom just so it looks right. Otherwise I can forget about them for the mean time. In this case the frame is going to be fillet brazed so I miter and braze and polish those joints as usual.
With the brazing complete I do the clean up on the fillets and couplers and the couplers get a simple polish to give them a bit of shine. One nice thing about doing finish work on a coupled bike is that I can break the frame into two pieces to give easier access to the joints being cleaned and shaped.
I then add the rear end of the frame to the front and all goes as usual. Once the frame is machined and aligned and fully readied for JB to paint I take the working nuts off and install the polished nuts in their place and it all goes into a box to go to paint. Once JB starts the paint he will carefully mask the couplers off and leave them unpainted.
A few words about couplers and whether they would be a good option for you —
- I do not offer couplers in the JKS series of frames. The tube butts are too short and the walls are too thin for me to feel good about putting the couplers in place. So I only offer couplers along with my standard offerings.
- I see couplers as a very good option for a dedicated travel bike. I do not think they are a good choice if the bike might see travel once every few years. They add weight and maintenance and no small amount of cost to the project. The couplers themselves are over $600 and you can figure another $600 or so for a travel case and all the accessories that make the whole pack/unpack process easy and smooth. So you could ship a standard non-coupled bike via Fed Ex or airline many times for the upfront cost of the system. That said if you travel a lot (like the owner of the featured bike — 2 or more trips a month) and want a good bike with you it will pay for itself very quickly. So if you travel a lot they can be a very good way to go.
- Lastly — I do not offer retro-fits of my bikes with couplers and will only build them in from the start. The biggest reason is the tube butting issue. It would be extremely rare for me to have an existing bike with tube butts long enough for me to be sure that I have the thick section of the tube in both sides of the coupler. So if you want a coupled travel bike I feel it’s best to start at the beginning and make one for that purpose.
I hope this gives you a bit better idea of how the couplers work and how they are built into the frame. Be sure to let me know if you have questions.
Thanks for reading,
Dave
-
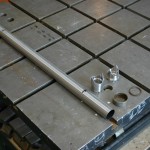
- tube butts marked and little peices
-
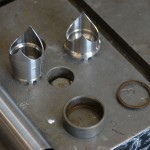
- the business part of the system.
-
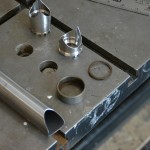
- front top tube miter done and couplers ready to install
-
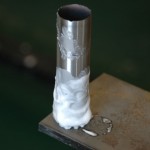
- fluxed and ready for heat.
-
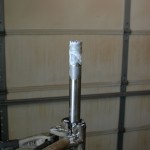
- the long section ready to braze.
-
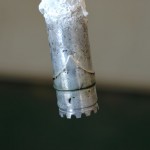
- still hot coupler.
-
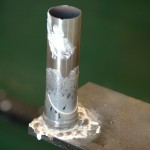
- rear section brazed.
-
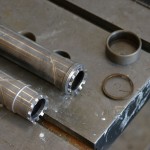
- cooled and cleaned and ready to be joined.
-
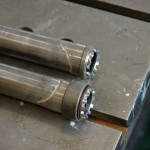
- working nut installed.
-
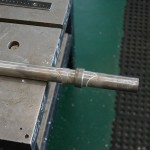
- voila! it’s a tube.
-
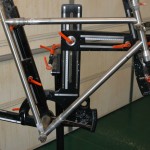
- fitting coupled tubes into jig.
-
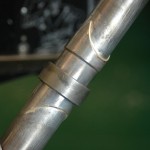
- down tube coupler.
-
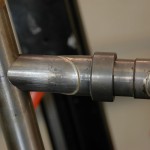
- top tube coupler.
-
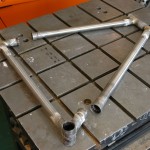
- It done broke!
-
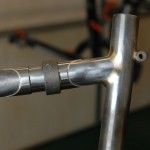
- polished fillet and coupler.
-
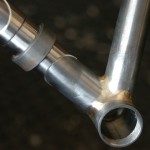
- Down tube/BB ready to have rear end added.
-
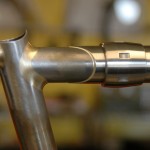
- Polished nut installed on ready for paint frame.
-
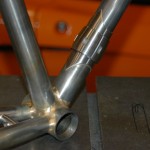
- BB area ready for paint.
Share this Article:



Leave a Reply
You must be logged in to post a comment.