Compare and Contrast.
No two bikes I build are the same and that certainly goes for these two. They are both steel and they are both built using fillets to allow to to use the tube sizes and angles I feel are best for the rider and beyond that they share little.
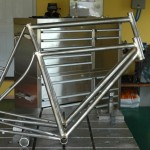
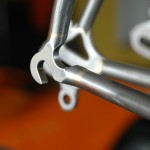
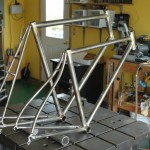
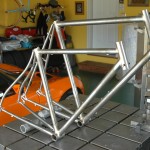
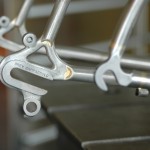
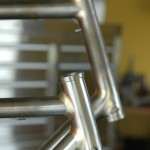
The smaller bike in the foreground is built for a small and light rider for general road and sport use. Because of the frame size (46 cm c-c) and the light weight of the rider I chose to use old school tubing diameters – 1″ top tube and 1 1/8″ down tube. A rider this size certainly doesn’t need an uber stiff bike and would certainly get beat up by a bike with the modern ‘oversize’ tubing that is used in most steel framesets. It uses very light chainstays to also just a bit of give to allow for a nice spring to it out of the saddle and it of course uses the new Triple F Kirk dropouts. This frame weighs in just a shade over 3 lbs.
The bike in the background is of course also fillet brazed and was built that way for the same reason as the small bike – the tubes and angles best suited to the rider will not allow for the use of lugs. This bike is a fully loaded touring bike built for a big guy who will be carrying a good 75 lbs of year on cross country tours. This frame needs to be very stiff to give it good handling with all that weight on the bike. You can see it has much longer chainstays that the smaller bike (a full 46 cm long) to give heal the bag clearance and a stable ride downhill. It also uses very old school Campagnolo 1010A dropouts with the long slot (let’s the rider run it as a single speed should the shifting system die in the middle of nowhere) hooked to beefy oversize chainstays. The main tubes on the bike are ‘double oversize’ Â – 1 1/4″ top and 1 3/8″ down with a pretty heavy wall to keep things in one piece regardless of where the bike is taken and how hard it is used. The frame weighs a solid 4.75 lbs.
These two bikes are both good examples of why fillets are sometimes used on my custom builds. Sometimes the bikes are built with fillets just for that seamless organic look and sometimes it’s just the best way to go.
It’s fun to see these two together and a rare thing that I have more than one frame in the shop. So I thought I’d take the opportunity to let you see them together so you could compare and contrast.
Thanks for reading.
Dave
Share this Article:
4 responses to “Compare and Contrast.”
Leave a Reply
You must be logged in to post a comment.



Love the insight into tubing choices.
In addition to beautiful craftsmanship the uniqueness of a frame suited to the rider and their style of riding is the most amazing aspect of “custom fit†frames. Well done!
Very interesting comparison, Dave. Aren’t the long Campy dropouts a bit more challenging to get the rear wheel in and out when using fenders? For some reason I was of the mindset that dropouts more similar to your FFF’s are more fender friendly. Please elaborate.
Hey John,
Yes the horizontal slots can make it more challenging to get the wheel out of the fender isn’t set properly. All that needs to be done is to set the fender line with the wheel in it’s 3/4 forward position and then it doesn’t need to come forward very far before it will slip out.
And again you are right that a semi-vert dropout will give the fastest and easiest changes on a race bike but for a touring bike 8 second wheel changes aren’t too important and the advantage of having the slot horizontal slot more than makes up for the extra few seconds it takes to get the wheel in and out.
Thanks for the question,
Dave