Photos – a 10 year history.
When I started my business ten years ago I vowed I wanted to do a few things differently from what other builders were doing at the time. One of the things I wanted to do was communicate better, more, and in more ways, with the customer so they felt more like a part of the process. After all, this having a made to measure bike made just for you can really be fun if you can see behind the curtain a bit.
One of the things I wanted to do differently was to share photos of the bike during its build process to try to take some of the black magic out of the process. This framebuilding gig is a very simple thing and I felt it silly that so many tried to make it sound like rocket surgery. So from the first days I started taking photos of the frameset as it started with a pile of raw tubes on the bench to the finished and ready to paint product. I would never claim to be the first to do this but I will say that at the time very few, if any, builders showed what was going on behind the curtain. I’ll delve more into this some time soon.
The other thing I wanted to do was to take photos of the finished and painted frameset to email to clients to get them excited about riding their new bike. Frankly the quality of the photos at first may not have excited any one but they worked at least to a certain extent to give the owner a rough idea of how the frameset/bike looked.
Right at first I knew NOTHING about how to take a decent photo. For the first few months I used a film camera and took the film to Costco for the 1 hour processing and then brought them home and scanned a few of the best ones and emailed them off. Not a quick or efficient process and when you add in the fact that the photo just weren’t very good and ………well………….you get the idea. At this point I was trying to figure out how to take a good photo of a bike and what to use as a backdrop. I looked around the house and ended up using a very dark green wool blanket (LL Bean!) or a scrap piece of Formica I had kicking around in the basement. I upgraded the camera is a big way to a small digital point and shoot and was pretty darn proud of the mediocre photos I managed with it. I knew they were better but they still weren’t in any way actually good.
In time I realized that I had a lot to gain by making better photos so I scrimped and saved and bought my first ‘real’ camera — a Nikon D70. I went plum crazy and bought I tripod and a remote trigger. Cool I know. Well if not I at least thought it was cool but I had no idea how to use the thing and I still didn’t have a real backdrop. So I set them on my porch or against a blanket and did my best.
The next step was a big one……….. I set up an ‘official’ photo studio in my basement. I took some scrap lumber and made a box to perch the bike on and then bought some 9 foot wide photo backdrop paper to cover up the box and the wall behind it and voila! ………… photo studio. I got some cheap halogen shop lights and hung old white bed sheets in from of them to act as diffusers and it looked OK…………not great but OK. I’m sure someone more skilled with the camera could have gotten better results but I did my best. The important thing was the customers loved the photos and shared them and that is a good thing for my business. I used this set up for a number of years before I started working on an upgrade.
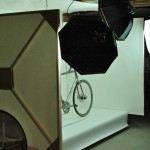
I did some reading and got a bit better with the camera but knew that I needed to improve my set up, backdrop and lighting. Over time other builders seemed to follow suit and share photos of their work too and some of them were very good — much better then mine. Yet another reason to up my game. So a bit of thought and a small amount of money went into making a proper perch for the bike or frameset. A lazy Susan type deal allows the bike to be rotated so that I can get the best line on the shot I want without having to move the camera a lot or end up having the angle I’m shooting at show the cat boxes in the background. I then made what is in effect a 6’ x 6’ x 9’ paper box with one side missing to bounce the light off of and give a nice backdrop.
The last thing needed was good lighting. I looked around a bit and had zero clue of what to get and good stuff isn’t cheap. I then got very lucky because my good friends Loretta and Carl Strong (you might have heard of them) had just bought new lighting for a new photo booth they were setting up. Being the helpful and generous folks they are they let me barrow their lighting and try it out. I loved it. So I bought the same damn stuff. Thank you Carl and Loretta.
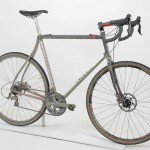
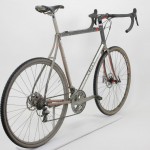
Today all of the new parts came together for the first time. The new stand with its rotating base, the new paper box and the new lights suspended from the ceiling and I was off to the races. All I needed was a bike to test it out on. But I didn’t have a clean and photo-worthy bike………..but I did have a filthy cross bike that I’d just ridden the day before on slime covered ice and muck. Perfect. The first few shots show the booth from the outside so that you can get a rough idea of what it looks like with the lights hanging in front of it and the rest of course are of a bike that could use a good cleaning.
So there is the not so brief tale of how I got to this place with taking photos. Like I said earlier — not many builders where doing this kind of thing ten years ago and I like to think I pushed some others to follow suit. I feel these are the best photos I’ve ever taken and look forward to learning more and doing better.……and to pushing others to up their game. That old saying ‘a high tide raises all boats’ comes to mind. That’s the thing……what seems good now will no doubt seem average in a few years and then I’ll need to up my game again. But that’s the way this works and I like that a lot.
Thanks for looking.
Dave
Share this Article:
5 responses to “Photos – a 10 year history.”
Leave a Reply
You must be logged in to post a comment.

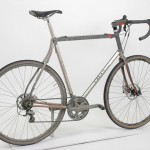


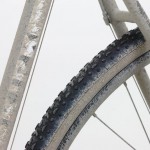


The seat cluster shot is terrific. This bike wears dirt well.
Thanks – it was really fun getting it dirty and I still have a bit of grit in my eyes.
Aloha Dave, Great set up & photos. That’s some the of the cleanest dirt, and 2nd on how the bike wears it 🙂
Dave very cool update and setup! I also really like how the bike looks “ridden hard and put away wet”.
Flash photography is a lot of fun, especially with a subject that will do whatever you tell it to!
Part of the fun of studio photography is adjusting the light ratios to bring out some depth to the tubes and curves of the frame. Try putting the strongest light above the bike to cast shadows on the tubes. This especially makes bars and bar tape look fantastic.