Travel bikes.
Travel bikes really do rock. If you travel and like to stay fit or explore by bike while away from home is sure is nice to have a real proper fitting bike that is fully “LHR” (long hard ride) worthy. I’ve been building a good number of bikes with the S&S couplers built into them and I’ve shown in this space how that kind of work is done. It’s very simple to build them in from the start — you install the coupler into the tube and then treat it like any other tube during the build and ‘voila!’Â – you then have a bike that breaks into two pieces and then will fit into a 26” x 26” x 10” hardcase that you can fly with and just check as luggage. Pretty cool.
There is of course another way to do this and that is with an existing bike. Karin has family that lives in Europe and she likes to visit and have a bike there to use for rides in the Alps. So a number of years ago we took an old rattle-can purple Serotta we had hanging on a hook and put some budget parts on it and shipped it over so it would be there for her visits. It’s old and heavy and doesn’t fit that well but was fine for riding to a coffee shop. That said it falls way short when she brings it into the high Alps. So we decided to take her old Kirk and cut it up and install couplers in it for such trips and I thought I’d document how that retrofit is done.
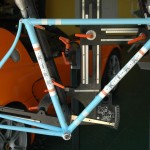
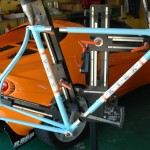
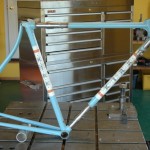
The first thing is to set the jig to match the built frame so that once you cut it in half that you can properly orient the two halves relative to one another. This is a very important step.
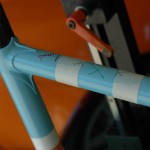
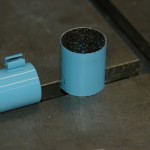
Next you need to decide where the couplers will be inserted and then cut out the chunk of tube that the coupler will replace. I’ve marked this with special high-tech masking tape where I will cut the two pieces out and then into the vice it goes for the cutting. Way back when it bothered me to take a perfectly good frame and pass a saw blade through it but now I don’t think twice about it. Measure twice — cut once as they say.
The 35 mm pieces that get removed are then set on the shelf as an interesting conversation starter until I get tired of cleaning around them and toss them in with the other steel into the recycling bin.
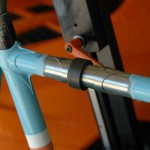
You can see in the photos that I have set front and rear ends of the frame into the jig to check that the tubes have the proper gap between them. This part looks odd.
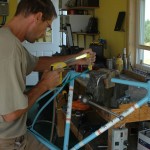
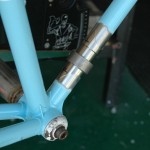
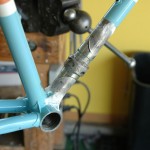
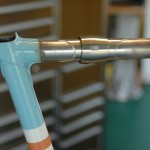
Now I dry-fit the couplers in place and put the whole deal in the jig to make sure everything is just right before brazing them in. With that check done I move onto cleaning everything very, very well. The frame has rust proofing goo in it that needs to be removed and everything needs to be sanded and cleaned and re-cleaned. I also clean the couplers themselves well and install the ‘work nut’ onto them. It’s a simple nut that can go through the brazing process without getting messed up. The pretty nut will replace it later.
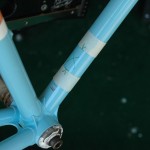
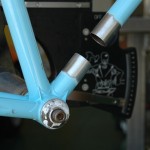
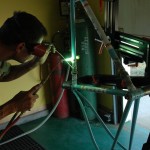
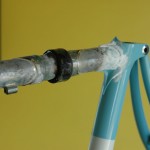
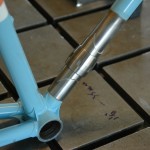
With everything very clean and ready to go I slop flux onto everything and place it all back in the jig and carefully braze both couplers in. The photos show the after effects of this with glass hard flux coating everything. I also change the cable routing at this time both on the top tube for the brake and the head tube for the derailleur cables. I remove the treaded adjusters and replace them with split cable guides to make the whole thing easier to deal with when packing/unpacking. Once cool it goes into a hot water bath to soak the flux off and then everything gets cleaned and polished.
At this point it’s ready to have repainted. Karin tells me she’s thinking it will be red this time. It’s hard to picture her on anything but a light blue bike — we’ll see.
Happy Travels.
Dave

Share this Article:
3 responses to “Travel bikes.”
Leave a Reply
You must be logged in to post a comment.


Hey Dave,
Any significance to moving the cable stop from the head tube to the down tube?
Jayme
Hey Jayme,
It’s not a big deal but since the bike was going to need a repaint anyway I decided to move the cable guides to the down tube. It just gives a slightly longer cable run that makes stringing the cables a bit easier when the bike is reassembled. Anything to make it easier I say as the job is almost always done on the floor or in a hotel room somewhere.
Dave
Thanks Dave.