Kirk Fat.
Winter in Montana is long……..very long…….and one needs to have stuff they enjoy doing outside during all those cold and snowy months. As the old timers say “winter is 9 months long and then there’s 3 months of really tough sledding.” For a few decades I did a lot of XC skate skiing and enjoyed it. It has its downside and for me that’s that I need to load of the car and drive a few miles to ski. I’m very lucky to have good skinny skiing so close but I still didn’t like having to drive to get my fix. Combine this with some upper back issues that don’t like the poling motion and that meant my skinny skis stayed in the rack.
About this time fatbikes started to become available…or I should say that the tires and rims became available and that allowed everything else to fall in place. The frame really is the easy part in the big picture on a fat bike. It’s the special hubs (170 mm rear, 135 mm front), bottom bracket and crank (designed to work with a 100 mm wide BB shell), and the huge offset front derailleur (needs to extend way off the seat tube to reach the chain rings WAY out there where the rings are) that are the tough part. I frankly wasn’t sure I wanted to build one just to try it out but I could buy one and see what it’s like — so that’s what I did. I bought a Surly Moonlander complete with its 100 mm wide rims and 4.7” tires. If those seem like huge numbers to you they should. The bike is huge fat in every way.
I find I now look forward to snow falling and getting packed into just the right consistency so that I can bust out the big bike and have fun and stay fit. That said, the bike I bought is a real tank at 34+ pounds and the geometry left a lot of room for improvement so I decided to take the time to build myself a lighter and more nimble fillet brazed fatbike designed for how and where I’ll use it. I’ll be building it with shorter stays, a lower BB and steeper front end to help counter the weight of the huge tires and make the steering quicker.
The tough thing about building a fatbike is of course the rear end and the fork. I opted for a Salsa aluminum fork and so that made that super easy but chain and seat stays aren’t quite so simple. I ended up using Deda 29’er stays and changing the bends a good bit and this, along with the 100 mm wide bottom bracket and 170 mm rear hub, allows me to get these tubes to all play nice with a 4.8” tire. The main tubes are a mix of Deda (1.5” down tube) and Reynolds (853 Pro top tube and 725 externally butted seat tube) that are plenty tough but should be loads lighter than the bike I’m riding now.
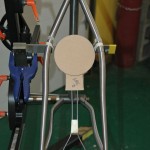
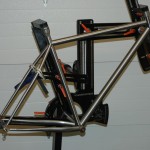
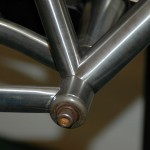
The photos show the dry fitting of the all the mitered tubes into the Anvil jig with a cardboard tire mock up so that I can check tire clearance as the tubes are mitered to fit. I often make a faux tire like this when I’m not 100% sure of tire clearance but I must say this thing just looks silly. As you can see all the tubes are mitered and fit into the jig and ready to clean, tack and braze.
Over the next week or so I’ll be sharing more photos of the build and to give a better idea of what goes into building a fillet brazed prototype like this. So — stay tuned and watch it come together. And………if you have any ideas for a bright color to paint the beast feel free to chime in.
Dave
Share this Article:


Leave a Reply
You must be logged in to post a comment.